| Welcome, Guest |
You have to register before you can post on our site.
|
| Forum Statistics |
» Members: 3
» Latest member: RT252
» Forum threads: 1
» Forum posts: 10
Full Statistics
|
| Online Users |
There are currently 101 online users.
» 0 Member(s) | 98 Guest(s)
Bing, Facebook, Twitter
|
| Latest Threads |
Saggy Ass and Raising the...
Forum: Stunt Companies
Last Post: nags
10-05-2026, 08:07 PM
» Replies: 40
» Views: 1,494
|
FS: Naarden Saggy Ass F4i...
Forum: Stunt Companies
Last Post: nags
10-05-2026, 08:07 PM
» Replies: 58
» Views: 2,272
|
Dowheelies.com Review of ...
Forum: Help and How To
Last Post: nags
10-05-2026, 08:07 PM
» Replies: 12
» Views: 437
|
f4i saggy ass lift kit???...
Forum: Stunt Discussion
Last Post: nags
10-05-2026, 08:07 PM
» Replies: 35
» Views: 1,320
|
What's up bitches
Forum: General Discussion
Last Post: lunchbox-
09-29-2026, 03:40 PM
» Replies: 47
» Views: 2,461
|
so who all is back on her...
Forum: Stunt Discussion
Last Post: COOLIE
09-24-2026, 01:20 PM
» Replies: 3
» Views: 204
|
Where the E-Bikes at?
Forum: E-Bikes
Last Post: nags
09-22-2026, 10:56 PM
» Replies: 0
» Views: 79
|
A picture of my whore sis...
Forum: Dating and Sex Life!
Last Post: MiNi GuineA
09-10-2026, 09:30 PM
» Replies: 23
» Views: 1,138
|
Need deletion
Forum: Kelm Stunts
Last Post: Skillz954
08-31-2026, 10:00 AM
» Replies: 4
» Views: 315
|
WHERE'S THE MENS ROOM?
Forum: General Discussion
Last Post: Ethiopian
08-29-2026, 09:36 PM
» Replies: 9
» Views: 483
|
|
|
| 675 stunter builder upper |
|
Posted by: CELFLEX - 11-30-2012, 09:58 AM - Forum: Projects and Builds
- Replies (20)
|
 |
K peeps<br />
<br />
Tear down has began. <br />
<br />
<img src="http://i109.photobucket.com/albums/n46/themichiganfaction/c712f87c.jpg" border="0" alt="" /><br />
<br />
<img src="http://i109.photobucket.com/albums/n46/themichiganfaction/4FD45A22-8E65-46B7-8FE0-CCBB877E75AC-2678-000003364E1802F9.jpg" border="0" alt="" /><br />
<br />
Parts list <br />
<br />
Candy blue badass full frame <br />
Chrome Badass cage<br />
Chrome wheels<br />
Zeus subcage, rad cage , round bar ( maybe chrome)<br />
Graveyard tank<br />
Jb seats <br />
Midnight exhaust and big rotor kit<br />
<br />
<br />
Prolly going to convert to street fighter or race fairings
|

|
|
| Milky day Farmers dump thousands of liters of milk on Brussels police |
|
Posted by: CheddarBob - 11-28-2012, 11:03 PM - Forum: Politics and Religion
- No Replies
|
 |
<object width="425" height="350"><param name="movie" value="http://www.youtube.com/v/hdhuzJPycWE"></param><embed src="http://www.youtube.com/v/hdhuzJPycWE" type="application/x-shockwave-flash" width="425" height="350"></embed></object> <br />
<br />
<br />
<object width="425" height="350"><param name="movie" value="http://www.youtube.com/v/UIs5_FA4d98"></param><embed src="http://www.youtube.com/v/UIs5_FA4d98" type="application/x-shockwave-flash" width="425" height="350"></embed></object> <br />
<br />
the dairy farmers aren't happy this much i know.
|
|
|
|
| icon women's stryker vest |
|
Posted by: 600rrupncomer - 11-28-2012, 11:58 AM - Forum: Female Stunters
- No Replies
|
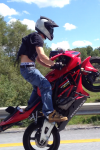 |
Thinking about buying it for my girl this Christmas, just wanted to know what any of you think about it. She's 5'5" 110 c's , I've seen some reviews saying its too loose, no one said its fit that great so I was going to wait to see if they fix that issue. However any input input would be great.
|
|
|
|
| HOW TO: GoPro chin mount |
|
Posted by: 762SPR - 11-28-2012, 09:41 AM - Forum: Help and How To
- Replies (18)
|
 |
I didn't want to modify my helmet to mount my camera, but the front part was way too curved for the normal GoPro adhesive mounts to stick to, so here's what I did:<br />
<br />
The first step is to put on some masking tape as a guide for where you want to mount to end up. Next I put down a piece of clear packing tape, you will see why later, but you want to cover the helmet completely inside of the masking tape. You also need to peel off the adhesive pad from the GoPro mount.<br />
<br />
[image no longer available]<br />
<br />
Next, Rough up the mount with some sandpaper. 80 grit or thereabouts. <br />
<br />
[image no longer available]<br />
<br />
Mix up a small batch of Bondo and spread it onto the back side of the mount, then press it onto the helmet. This is what the packing tape is for, the bondo shouldn't stick to it. I sprayed mine with some silicone mold release just to be safe but it probably isn't needed... or you could use oil or butter or whatever.<br />
<br />
[image no longer available]<br />
<br />
Try not to mess with it too much while the bondo kicks, but make sure to get it aligned right.<br />
<br />
[image no longer available]<br />
<br />
Then peel it off and it should look something like this.<br />
<br />
[image no longer available]
|
|
|
|
| Texas Riders... which city? |
|
Posted by: Pozer - 11-28-2012, 04:55 AM - Forum: Southwest
- Replies (4)
|
 |
I'll be arriving in Austin this sat to pick up my keys to my new place =). Pretty stoked now after reading this thread as I have no fucking clue what Austin is like either. <img src="images/legacy/smilies/rockwoot.gif" border="0" alt="" title="YEAH" class="inlineimg" />
|
|
|
|
| My New Bike start of build |
|
Posted by: Zackp00 - 11-27-2012, 11:04 PM - Forum: Projects and Builds
- Replies (26)
|
 |
Thanks man and I done ordered the atown subframe brace and round bar that is what I kept hearing about that is first time I've heard of NDC. I'm not wanting to crash but darn sure know it's part of it and I just really want get decent on a bike lol. I'm not bad and don't think I'll tear it up to bad I'm pulling all fairing off for a lil bit.
|
|
|
|
| Get 25% off at our Store! “SANTA STUNTS” |
|
Posted by: Stuntride Archive - 11-26-2012, 08:00 AM - Forum: Blog Archive
- No Replies
|
|
<p style="text-align: left;">Who knew Santa could ride wheelies???</p>
<p style="text-align: left;">Use the code “SANTASTUNTS” at our store and get 25% from now till December 13th! <a href="http://www.stuntridestore.com" target="_blank">www.stuntridestore.com</a></p>
<p><a href="http://www.stuntridestore.com"><img alt="Santa Stunts 25% off at StuntrideStore.com" class="aligncenter size-large wp-image-1425" height="724" src="/images/archive/blog/blog_wp-content_uploads_2012_11_santa-stunts-560x724.png" title="Santa Stunts 25% off at StuntrideStore.com" width="560"/></a></p>
<p>While you’re there, check out some of our newest designs!</p>
<p><a href="http://stuntride.bigcartel.com/product/muthafuckin-stuntrider-t-shirt"><img alt="" class="wp-image-1426 alignleft" height="140" src="/images/archive/blog/blog_wp-content_uploads_2012_11_MF-SR-RED-cropped-150x150.jpg" title="MF-SR-RED-cropped" width="140"/></a><a href="http://stuntride.bigcartel.com/product/digital-camo-stuntride-t-shirt"><img alt="" class="alignnone" height="140" src="http://cache0.bigcartel.com/product_images/80820837/digicamo-front.jpg" title="digi camo" width="150"/></a><a href="http://stuntride.bigcartel.com/product/og-stuntride-stoppie-tee-short-sleeve"><img alt="" class="wp-image-1427" height="140" src="/images/archive/blog/blog_wp-content_uploads_2012_11_OG-Stoppie-cropped-150x150.jpg" title="OG-Stoppie-cropped" width="140"/></a></p>
|
|
|
|
| DIY Servo Bypass/Removal - 05/06 636 |
|
Posted by: Petarded - 11-25-2012, 09:46 PM - Forum: Help and How To
- Replies (10)
|
 |
DIY Servo Bypass/Removal/FI light fix 05/06 636<br />
<br />
... From servobuddy ... this should work for ...<br />
2004-2013 ZX10R<br />
2005-2013 ZX6R (And 636)<br />
2003-2006 ZX636<br />
2007-2012 Z750<br />
2007-2013 Z1000<br />
2007-2013 Ninja 1000<br />
<br />
I did a lot of research on this from the zx6r forum (and found a 16 page thread with a lot of information spread throughout). I then had to read thoroughly through the mess of posts (since the first post was an intermittent fix and did not consistently bypass the servo). I also researched on other forums zx-10r.net and others. <br />
<br />
In the end I have found the solution and I am sharing an easy tutorial with you. <br />
<br />
Disclaimer: I do not claim responsibility and will not fix your bike if you break/burn/explode it as a result of this tutorial.<br />
<br />
<b>What you need:<br />
</b><ul><li>Wire cutters & strippers</li>
<li>Soldering Iron & solder</li>
<li>1/2 watt 220 ohm resistor (red, red, brown, gold) ($1.19 at radioshack)</li>
<li>1/2 watt 4.7k ohm resistor (yellow, purple, red, gold) ($1.19 at radioshack)</li>
<li>330 ohm 1/4w 5% tolerance resistor ($1.19 at radioshack)</li>
<li>470 microfarad (uF) w/35v max capacitor ($1.39 at radioshack)</li>
<li>servo motor harness</li>
<li>epoxy or hot glue (hot glue turned out to be MUCH better)</li>
<li>electrical tape</li>
</ul><br />
Total cost for me for both my 636's was around 10 bucks<br />
<br />
Pic of my supplies (epoxy was a mess, took forever to dry, and overall sucked... I ended up using hot glue)<br />
<img src="https://lh6.googleusercontent.com/-YLNJle1-JRY/ULK0oIuusWI/AAAAAAAABxQ/t5UTFke7Dss/s1051/IMAG0084.jpg" border="0" alt="" /><br />
<br />
Removing servo from stunt 636<br />
<img src="https://lh6.googleusercontent.com/-aBJau0TcgdA/ULK0oHsW6kI/AAAAAAAABxM/nEV1dyMXfCc/s1051/IMAG0093.jpg" border="0" alt="" /><br />
<br />
Shotout to my "wheelie cool", simple green (because it's awesome), and to burger king for its 55'th anniversary of the whopper. <br />
<br />
Cut the harness from the servo... (then cut and electrical tape the grey and white wires as you do not need them)<br />
<img src="https://lh5.googleusercontent.com/-tZjMhraCgBQ/ULK0oLq9SEI/AAAAAAAABxI/IbPCc2mmhDM/s1051/IMAG0098.jpg" border="0" alt="" /><br />
<br />
Solder the 330 ohm resistor to the positive and negative side of the capacitor.<br />
<img src="https://lh3.googleusercontent.com/-CG_AoyRmU9k/ULK0pIulpNI/AAAAAAAABxg/uvyt1KaqpqU/s1051/IMAG0101.jpg" border="0" alt="" /><br />
<br />
Solder the yellow wire to the 4.7k ohm resistor then to the positive side of the capacitor.<br />
<img src="https://lh5.googleusercontent.com/-ub9WTafoK4s/ULK0pjkBjqI/AAAAAAAABxo/IoOYzCDX6z0/s1051/IMAG0103.jpg" border="0" alt="" /><br />
<br />
-- Solder the black wire to the negative side of the capacitor (after the 330 ohm resistor that is connected between the positive and negative side of the capacitor) <br />
-- Solder the red wire to the 220 ohm resistor then solder it to the top of the positive side of the capacitor. <br />
-- Again you cut and electrical tape the white and grey wires as they are not needed<br />
<img src="https://lh3.googleusercontent.com/-5lRzGonoqRI/ULK0qfOSV5I/AAAAAAAABxw/c9EICpv1k18/s1051/IMAG0104.jpg" border="0" alt="" /><br />
<br />
I tested it and it successfully removed the FI light so I ran back to radioshack bought one more capacitor then removed the servo from the streetbike.<br />
<img src="https://lh5.googleusercontent.com/-vuYY52bMZNA/ULK0reAk5jI/AAAAAAAABx8/07NFh_R_xIA/s1051/IMAG0108.jpg" border="0" alt="" /><br />
<br />
Pic of me cutting the harness from the servo and then cutting the white and grey wires (and electrical taping them).<br />
<img src="https://lh5.googleusercontent.com/-lfU5At5bh7Q/ULK0sy8gjWI/AAAAAAAAByI/TjR2xwrlA5E/s1051/IMAG0110.jpg" border="0" alt="" /><br />
<br />
Once successful in connecting all the wires... from the streetbike servo harness... I tested/confirmed it worked and then hot glued the connections to ensure they do not come loose and are protected.<br />
<img src="https://lh3.googleusercontent.com/-7jK-5tiQKJ0/ULK0s1MeurI/AAAAAAAAByM/WRbEGB_9niA/s1051/IMAG0112.jpg" border="0" alt="" /><br />
<br />
Do not hot glue the connections until you test it... otherwise you may have to start all over. Just make sure you solder your connections well while being careful not to burn your capacitor/resistors and you should be fine, but I suggest you still test it before hot glue.<br />
<img src="https://lh4.googleusercontent.com/-MBE_YBFPgYI/ULK0tGZu7DI/AAAAAAAAByQ/p2XVbXnAPgY/s1051/IMAG0113.jpg" border="0" alt="" /><br />
<br />
COMPLETED... <br />
(When I installed them I electrical taped the circuit to the existing wiring harness under the seat to try to keep the new connections from bouncing around)<br />
<img src="https://lh6.googleusercontent.com/-3X0jieTWG-8/ULK0udLlMoI/AAAAAAAAByg/-RpoYeIBaZU/s1051/IMAG0114.jpg" border="0" alt="" /><br />
<br />
<img src="images/legacy/smilies/cheers.gif" border="0" alt="" title="Cheers" class="inlineimg" /> <img src="images/legacy/smilies/rockwoot.gif" border="0" alt="" title="YEAH" class="inlineimg" />
|
|
|
|
|