| Welcome, Guest |
You have to register before you can post on our site.
|
| Forum Statistics |
» Members: 3
» Latest member: RT252
» Forum threads: 1
» Forum posts: 10
Full Statistics
|
| Online Users |
There are currently 98 online users.
» 0 Member(s) | 95 Guest(s)
Bing, Facebook, Google
|
| Latest Threads |
Saggy Ass and Raising the...
Forum: Stunt Companies
Last Post: nags
10-05-2026, 08:07 PM
» Replies: 40
» Views: 1,492
|
FS: Naarden Saggy Ass F4i...
Forum: Stunt Companies
Last Post: nags
10-05-2026, 08:07 PM
» Replies: 58
» Views: 2,268
|
Dowheelies.com Review of ...
Forum: Help and How To
Last Post: nags
10-05-2026, 08:07 PM
» Replies: 12
» Views: 436
|
f4i saggy ass lift kit???...
Forum: Stunt Discussion
Last Post: nags
10-05-2026, 08:07 PM
» Replies: 35
» Views: 1,319
|
What's up bitches
Forum: General Discussion
Last Post: lunchbox-
09-29-2026, 03:40 PM
» Replies: 47
» Views: 2,460
|
so who all is back on her...
Forum: Stunt Discussion
Last Post: COOLIE
09-24-2026, 01:20 PM
» Replies: 3
» Views: 204
|
Where the E-Bikes at?
Forum: E-Bikes
Last Post: nags
09-22-2026, 10:56 PM
» Replies: 0
» Views: 79
|
A picture of my whore sis...
Forum: Dating and Sex Life!
Last Post: MiNi GuineA
09-10-2026, 09:30 PM
» Replies: 23
» Views: 1,137
|
Need deletion
Forum: Kelm Stunts
Last Post: Skillz954
08-31-2026, 10:00 AM
» Replies: 4
» Views: 315
|
WHERE'S THE MENS ROOM?
Forum: General Discussion
Last Post: Ethiopian
08-29-2026, 09:36 PM
» Replies: 9
» Views: 482
|
|
|
| new jack city |
|
Posted by: Atown1101 - 03-26-2013, 10:23 PM - Forum: Stunt Discussion
- Replies (19)
|
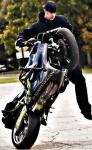 |
can anyone guess what subframe this is without looking at the label at the bottom LOL i mean come on at least try to make your own and not just set a jig around mine and call it yours. just a few changes hell anything for that matter jacked parts.jpg
|

|
|
| 01 f4i rebuild |
|
Posted by: zprt00 - 03-26-2013, 04:26 PM - Forum: Projects and Builds
- Replies (24)
|
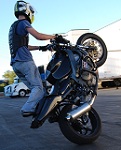 |
Sitting here procrastinating starting a fuckton of homework I thought I'd make a thread to document the rebuild of my f4i for this season. Got it last <br />
may as my first stuntbike already set up. 19mm nissin hb master, 929 forks, 905 cage, hohey 4 piston dcb, vortex clipons, 64t sprocket, 12 bar and<br />
that's all i can think of off the top of my head. Looks way better in pictures than in person.<br />
<br />
<img src="http://i.imgur.com/zrfXwDd.jpg" border="0" alt="" /><br />
<img src="http://i.imgur.com/16F8Bsf.jpg" border="0" alt="" /><br />
<br />
Little by little I began fixing small issues and started to actually ride it. I progressed and eventually I got tired and scared of riding a pile of doo doo<br />
that vibrated and rattled like crap as soon as I hit the throttle. I've had subframe bolts come off, rear set come off etc. So last week I decided to tear it <br />
down to tighten everything up. While I was at it, I said fuck it, might as well paint it. So i will be getting that done this or the next week. Plus I've come <br />
across a bunch of things that need and will be fixed. Oh well. Here she is right before the tear down.<br />
<br />
<img src="http://i.imgur.com/HXu9ys5.jpg" border="0" alt="" /><br />
<img src="http://i.imgur.com/o0I8YSf.jpg" border="0" alt="" /><br />
<br />
To do list:<br />
- new hb master, r1 brembo, got it 3 weeks ago<br />
- replace pitted forks (ordered)<br />
- fix radiator<br />
- shorten the stock exhaust, maybe get a new one<br />
- replace rear wheel bearings. They were a hot mess and the <br />
wheel rocked side to side like crazy, rubing on the dcb (ordered a set but a wrong one FML, replacement already in the mail)<br />
- get a fender<br />
- fix right motor mount<br />
- put a small lip on the tank and fix holes<br />
- Paint frame, swingarm, plastics, tank<br />
- valve adjustment<br />
- throttle body sync<br />
- clean the fuck out of everything<br />
- torch brake pads to rid of fork oil<br />
- rsc (got it last week)<br />
- replace head bearings (got them today)<br />
- fix the cage and make longer sliders<br />
- all new fluids (duh)<br />
- probably more little annoying crap<br />
- put it back together within two weeks from now hopefully<br />
<br />
Taking her apart.<br />
<br />
<img src="http://i.imgur.com/iQBQKGmh.jpg" border="0" alt="" /><br />
<img src="http://i.imgur.com/aLAD4Ebh.jpg" border="0" alt="" /><br />
<br />
During ( doesn't look that bad here)<br />
<br />
<img src="http://i.imgur.com/1cmCwy1.jpg" border="0" alt="" /><br />
<br />
How most of it sits as of 10 minutes ago<br />
<img src="http://i.imgur.com/BJyZnlx.jpg" border="0" alt="" /><br />
<br />
Filthy wheel bearings<br />
<img src="http://i.imgur.com/OAfk1QO.jpg" border="0" alt="" /><br />
<br />
I will be udpating this little by little as I get parts in or things done.
|
|
|
|
| thats what you get for doing squidish straightline combo's on 2 wheelies |
|
Posted by: khalid - 03-26-2013, 02:52 PM - Forum: Videos and Reviews
- No Replies
|
 |
<img src="images/legacy/smilies/nohandno.gif" border="0" alt="" title="No no!" class="inlineimg" /> <img src="images/legacy/smilies/LolLolLolLol.gif" border="0" alt="" title="LOL" class="inlineimg" /> <br />
<object width="425" height="350"><param name="movie" value="http://www.youtube.com/v/_YIWQQOo4Hw"></param><embed src="http://www.youtube.com/v/_YIWQQOo4Hw" type="application/x-shockwave-flash" width="425" height="350"></embed></object><br />
*on 2 wheels
|
|
|
|
| Badass Industries 03/04 636 Full Fairing |
|
Posted by: C-Bear - 03-26-2013, 02:58 AM - Forum: Projects and Builds
- Replies (14)
|
 |
I've always wanted to do this color scheme and I finally did it. I would have posted build progress along the way but i built it in 2 days so here are all the pics. This build wouldn't have been possible without Jacob Wiseguy Cox (CAPITAL POWDERCOATING) who did all my fresh powder! Get at him for anything you need done! Hes got some sick colors that he's coming up with. Also BADASS INDUSTRIES for hooking me up with the frame. I actually will be building another bike but with the Badass Industries FULL FRAME bike once Billie is finished with it! Im not quite sure what colors its going to be yet but I'm thinking about extending it a little for a drift/stunt bike, not too sure yet. Hope you like my build! <img src="images/legacy/smilies/cheers.gif" border="0" alt="" title="Cheers" class="inlineimg" /><br />
<br />
right when i got it in the mail<br />
IMG_20130213_162651.jpg<br />
<br />
jake picked it up and the next day had the frame done<br />
IMG_20130217_210706.jpg<br />
<br />
<br />
IMG_20130220_174206.jpg<br />
<br />
Im rebuilding both my bikes since badass industries hooked me up with two frames!<br />
IMG_20130220_235625.jpg<br />
<br />
motor in<br />
<br />
<img src="images/legacy/misc/pencil.png" border="0" alt="" />motornframe.jpg
|
|
|
|
| My new Street F4i |
|
Posted by: PoltArt - 03-25-2013, 12:31 AM - Forum: Projects and Builds
- No Replies
|
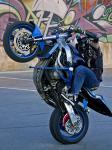 |
So I bought this bike back in November. The goal was to make it a clean street bike. I plan to use it mainly to commute and go on group rides. But wanted to be able to do wheelies as well (duh!)<br />
<br />
So anyways, after a few months I have it finally done! Only big change I plan on doing now is a wrap. And next winter get everything powdercoated hopefully.<br />
<br />
Also I tried to put the air ram covers back on but the convertibars on the 1000rr front end keep hitting them so I am trying to decide how to install those. Currently running without those covers.<br />
<br />
Here is a before and after pic. <img src="images/legacy/smilies/smile.gif" border="0" alt="" title="Smile" class="inlineimg" /><br />
<br />
The one on the right.<br />
<br />
<img src="http://imageshack.us/a/img18/1971/f4iq.jpg" border="0" alt="" /><br />
<br />
<img src="http://imageshack.us/a/img843/6803/f4idone.jpg" border="0" alt="" />
|
|
|
|
| through the wormhole |
|
Posted by: CheddarBob - 03-23-2013, 02:34 PM - Forum: Music / Movies / Games / TV
- Replies (6)
|
 |
ok so i really dig this show, its on season 4 and they ask some crazy questions. is time travel possible? is there life after death? is there a sixth sense? anyone else watch this? it seems more often then not that they end up with a physics studying these things to try to find the answers, kinda weird stuff but i dig it.
|
|
|
|
| Impaktech stunt cage installation help |
|
Posted by: nuttynu - 03-22-2013, 12:19 AM - Forum: Help and How To
- Replies (2)
|
 |
Sup everyone, just need some pointers and help and makin sure I'm install it all right.<br />
<br />
Doing it 0n my 05 Cbr .<br />
<br />
So this Is what came in.<br />
<br />
So my questions are, the long threaded rod goes in the engine bolts by the rear set ?<br />
<br />
And do I remove the castle nut on the right side of the bike by the rear set?<br />
<br />
& for the mounts where usually the "frame slider goes" the black bolts just screws in and the silver one goes on the other correct..? <br />
And what about the provided washer ? Do i need to use em too? So fAr I have it pre set up and almost looks correct but doesn't fully feel secure ..?<br />
<br />
On the right side , I installed it with the castle but still on. Is this correct ?<br />
<br />
Any help of advice would help, thanks guys.<br />
<br />
<img src="http://i262.photobucket.com/albums/ii97/nuxiong_92/Impaktech%20cage/IMG_8889.jpg" border="0" alt="" />
|
|
|
|
|