| Welcome, Guest |
You have to register before you can post on our site.
|
| Forum Statistics |
» Members: 3
» Latest member: RT252
» Forum threads: 1
» Forum posts: 10
Full Statistics
|
| Online Users |
There are currently 95 online users.
» 0 Member(s) | 93 Guest(s)
Bing, Google
|
| Latest Threads |
Saggy Ass and Raising the...
Forum: Stunt Companies
Last Post: nags
10-05-2026, 08:07 PM
» Replies: 40
» Views: 1,508
|
FS: Naarden Saggy Ass F4i...
Forum: Stunt Companies
Last Post: nags
10-05-2026, 08:07 PM
» Replies: 58
» Views: 2,285
|
Dowheelies.com Review of ...
Forum: Help and How To
Last Post: nags
10-05-2026, 08:07 PM
» Replies: 12
» Views: 440
|
f4i saggy ass lift kit???...
Forum: Stunt Discussion
Last Post: nags
10-05-2026, 08:07 PM
» Replies: 35
» Views: 1,328
|
What's up bitches
Forum: General Discussion
Last Post: lunchbox-
09-29-2026, 03:40 PM
» Replies: 47
» Views: 2,475
|
so who all is back on her...
Forum: Stunt Discussion
Last Post: COOLIE
09-24-2026, 01:20 PM
» Replies: 3
» Views: 208
|
Where the E-Bikes at?
Forum: E-Bikes
Last Post: nags
09-22-2026, 10:56 PM
» Replies: 0
» Views: 84
|
A picture of my whore sis...
Forum: Dating and Sex Life!
Last Post: MiNi GuineA
09-10-2026, 09:30 PM
» Replies: 23
» Views: 1,146
|
Need deletion
Forum: Kelm Stunts
Last Post: Skillz954
08-31-2026, 10:00 AM
» Replies: 4
» Views: 318
|
WHERE'S THE MENS ROOM?
Forum: General Discussion
Last Post: Ethiopian
08-29-2026, 09:36 PM
» Replies: 9
» Views: 491
|
|
|
| Video: 2011 NORTHEAST MEGA SESSION CLIP!!! |
|
Posted by: StrictlyStunt - 10-21-2011, 06:58 PM - Forum: Videos and Reviews
- Replies (19)
|
 |
<div style="display: none;" id="ame_noshow_post_1340989449_1">
<a href="http://vimeo.com/30928352" title="STRICTLYSTUNT PRESENTS: 2011 NORTHEAST MEGA SESSION CLIP on Vimeo" target="_blank">STRICTLYSTUNT PRESENTS: 2011 NORTHEAST MEGA SESSION CLIP on Vimeo</a>
</div>
<div style="display: inline;" id="ame_doshow_post_1340989449_1">
<div align="center">
<table class="tborder" cellpadding="6" cellspacing="1" width="425" style="margin:10px 0">
<thead>
<tr>
<td class="tcat" colspan="2" style="text-align:center">
<a href="http://vimeo.com/30928352" title="STRICTLYSTUNT PRESENTS: 2011 NORTHEAST MEGA SESSION CLIP on Vimeo" target="_blank">STRICTLYSTUNT PRESENTS: 2011 NORTHEAST MEGA SESSION CLIP on Vimeo</a>
</td>
</tr>
</thead>
<tbody>
<tr>
<td class="panelsurround" align="center">
<object type="application/x-shockwave-flash" width="425" height="350" data="http://vimeo.com/moogaloop.swf?clip_id=30928352&server=vimeo.com&fullscreen=1&video_info=1"> <param name="quality" value="best"><param name="allowfullscreen" value="true"><param name="scale" value="showAll"><param name="movie" value="http://vimeo.com/moogaloop.swf?clip_id=30928352&server=vimeo.com&fullscreen=1&video_info=1"></object>
</td>
</tr>
</tbody>
</table></div>
</div><br />
<br />
Got cut short by the 5.0, so sorry there's not more people in there. Was great to see everyone that I got a chance to see <img src="images/legacy/smilies/cheers.gif" border="0" alt="" title="Cheers" class="inlineimg" /> Hope you guys enjoy.
|

|
|
| Just bought a drz.. help me set this up |
|
Posted by: *MeatballStunts* - 10-21-2011, 12:19 PM - Forum: Quads / Dirtbikes / Motard / Trials
- Replies (19)
|
 |
Just picked up a used 06 drz. I want to ride this more for the streets and have my f4i for the lots but i still wanna set this drz up for some stunting too. <br />
<br />
Who makes a dual caliper bracket for a drz and what kind of master will work with this?<br />
<br />
And what changes in the gearing are most people running?<br />
<br />
And also is anyone making like a round bar for these with a little foot loop in it or something small to step into?<br />
<br />
I know about my f4i but this supermoto is new to me and i know nothing about setting up these bikes. I got alot of reading to do about supermotos now.
|
|
|
|
| Dirty George Killz, 2011 clip |
|
Posted by: Stuntride Archive - 10-21-2011, 08:00 AM - Forum: Blog Archive
- No Replies
|
 |
<p>The guys at <a href="http://www.strictlystunt.com" target="_blank">StrictlyStunt.com</a> had a really busy year and gathered a ton of media from events across the USA, here is the first video released from all of their footage in 2011. Its a profile clip of <a href="https://www.facebook.com/dirtygeorge" target="_blank">Dirty George</a>, Chat it up about this video with everyone on the forums here <a href="https://stuntride.org/showthread.php?tid=32950" target="_blank">stuntride.com/vbstunt/showthread.php?t=32950</a></p>
<p><iframe allowfullscreen="" frameborder="0" height="315" src="http://player.vimeo.com/video/30788277?portrait=0&color=c9ff23" webkitallowfullscreen="" width="560"></iframe>
<p><a href="http://vimeo.com/30788277">strictlystunt mixtape trailer – dirty george killz</a> from <a href="http://vimeo.com/strictlystunt">Ross Sharrer</a> on <a href="http://vimeo.com">Vimeo</a>.</p>
</p>
|
|
|
|
| Cycle Gear�s Wicked Weekend Sale, 10/22 & 10/23 |
|
Posted by: orl46 - 10-20-2011, 11:44 PM - Forum: New Member? Start here!
- Replies (1)
|
|
<b>Cycle Gear�s Wicked Weekend Sale, 10/22 & 10/23</b><br />
<br />
It's that time again! Wicked Weekend is October 22 and 23, and <b>you can get your tire package deals NOW!</b><br />
<br />
We have two of the most popular street/track tires at great prices and you don't have to wait to buy a set. Order your Dunlop Sportmax Q2 or Bridgestone BT-016 tire package deals <a href="http://www.cyclegear.com/events/2010/wws_2010.cfm" target="_blank">online</a> now or wait until Wicked Weekend and buy them in a <a href="http://www.cyclegear.com/store.cfm" target="_blank">store</a>.<br />
<br />
The same goes for the Dunlop D401, D402 and D404 cruiser tires � get your 15% off <a href="http://www.cyclegear.com/events/2010/wws_2010.cfm" target="_blank">online</a> now or get your deal in a <a href="http://www.cyclegear.com/store.cfm" target="_blank">store</a> during Wicked Weekend!<br />
<br />
And, of course, we have a bunch of other screamin� <a href="http://www.cyclegear.com/events/2010/wws_2010.cfm" target="_blank">deals</a>, too!<br />
<br />
<u><b>DATE:</b></u><br />
October 22rd and 23th, 2010<br />
<br />
<u><b>LOCATIONS:</b></u><br />
In <a href="http://www.cyclegear.com/store.cfm" target="_blank">stores</a><br />
<a href="http://www.cyclegear.com/" target="_blank">Online</a><br />
By phone (1-800-CYCLEGEAR, 1-800-292-5343)<br />
<br />
<u><b><a href="http://www.cyclegear.com/events/2010/wws_2010.cfm" target="_blank">DEALS</a>* (see below for more information):</b></u><br />
- <b>20% Off</b> Closeouts (in the �Outlet� section) <br />
- <b>25% Off</b> Frank Thomas and BKS<br />
- <b>15% Off</b> Street & Steel items<br />
- Bridgestone BT-016 and Dunlop Sportmax Q2 <b>Package Deals</b><br />
- <b>15%</b> Off Dunlop D401, D402 and D404 Cruiser Tires<br />
- Frank Thomas and Motoboss <b>Mesh Deals</b><br />
- Motrax <b>Buy-One-Get-One</b><br />
- Alpinestars B-52 <b>Jacket Deal</b><br />
- Shoei X-Eleven <b>Helmet Deal</b><br />
- <b>10% off everything else</b>**<br />
<br />
<br />
<img src="http://www.cyclegear.com/images/emails/email_wws_main-image.jpg" border="0" alt="" /><br />
<br />
<br />
<u>20% Off All <b>Closeout</b> Items</u><br />
<a href="http://www.cyclegear.com/category.cfm?L1=10000&nav=Clearance" target="_blank">http://www.cyclegear.com/category.cf...&nav=Clearance</a><br />
<br />
<u>25% Off All <b>Frank Thomas</b> and <b>BKS</b></u><br />
- Frank Thomas: <a href="http://www.cyclegear.com/productlist.cfm?brand=47&L1=5000&L2=2" target="_blank">http://www.cyclegear.com/productlist...7&L1=5000&L2=2</a><br />
- BKS: <a href="http://www.cyclegear.com/productlist.cfm?brand=3299&L1=5000&L2=2" target="_blank">http://www.cyclegear.com/productlist...9&L1=5000&L2=2</a><br />
<br />
<u>15% Off All <b>Street & Steel</b> Items</u><br />
<a href="http://www.cyclegear.com/productlist.cfm?brand=309&L1=5000&L2=41" target="_blank">http://www.cyclegear.com/productlist...&L1=5000&L2=41</a><br />
<br />
<u><b>Bridgestone</b> BT-016 and<b> Dunlop</b> Sportmax Q2 Package Deals</u><br />
Save by purchasing a 120 front paired with a 180 or 190 rear tire (while supplies last - seriously).<br />
- Bridgestone* <a href="http://www.cyclegear.com/spgm.cfm?L1=5000&L2=10&L3=155&L4=&item=TUC_30-1268_cmbo_G&name=BRIDGESTONE_BT016_Street_Motorcycle_Tire_PACKAGE_DEAL" target="_blank">BT-016</a> 120/70-17 front plus <b>180/55-17 rear</b> for only <b>209.99!</b> Save <b>$182.99 off MSRP!</b><br />
- Dunlop* <a href="http://www.cyclegear.com/spgm.cfm?L1=5000&L2=10&L3=1061&L4=&item=TUC_31-0832_cmbo_G&name=DUNLOP_Sportmax_Q2_Motorcycle_Tire_PACKAGE_DEAL" target="_blank">Sportmax Q2</a> 120/70-17 front plus <b>180/55-17 rear</b> for only <b>199.99!</b> Save <b>$248.75 off MSRP!</b><br />
- Dunlop* <a href="http://www.cyclegear.com/spgm.cfm?L1=5000&L2=10&L3=1061&L4=&item=TUC_31-0832_cmbo_G&name=DUNLOP_Sportmax_Q2_Motorcycle_Tire_PACKAGE_DEAL" target="_blank">Sportmax Q2</a> 120/70-17 front plus <b>190/50-17 rear</b> for only <b>199.99!</b> Save <b>$290.59 off MSRP!</b><br />
- Availability is severely limited. We'll try to fill all orders, but demand may outweigh our supply.<br />
- Further discounts may not be applied to this package deal. No double-dipping!<br />
- Sorry, but as much as we want to offer them, we don't have any 170/55 rears, 190/55 rears or 120/60 fronts.<br />
<br />
<u>15% Off <b>Dunlop</b> D401, D402 and D404 Tires</u><br />
<a href="http://www.cyclegear.com/productlist.cfm?kw=dunlop%20d40&L1=5000&L2=10" target="_blank">http://www.cyclegear.com/productlist...&L1=5000&L2=10</a><br />
<br />
<u><b>Frank Thomas</b> and <b>Motoboss</b> Mesh Deals</u><br />
Normally $399.99 each, Wicked Weekend Sale Price is $49.99 each (save over 60%) for Mesh Jackets & Pants. These are the WWS prices - no further discounting applies.<br />
- Frank Thomas: <a href="http://www.cyclegear.com/productlist.cfm?kw=frank%20thomas%20xti%202%20mesh&L1=5000&L2=2" target="_blank">http://www.cyclegear.com/productlist...h&L1=5000&L2=2</a><br />
- Motoboss: <a href="http://www.cyclegear.com/productlist.cfm?kw=motoboss%20air%20speed%20mesh&L1=5000&L2=2" target="_blank">http://www.cyclegear.com/productlist...h&L1=5000&L2=2</a><br />
<br />
<u><b>Motrax</b> Buy-One-Get-One</u><br />
This deal is by phone only: 800-CYCLEGEAR (800-292-5343). Buy any Motrax item, get one Motrax item of lesser value FREE: <a href="http://www.cyclegear.com/productlist.cfm?brand=14" target="_blank">http://www.cyclegear.com/productlist.cfm?brand=14</a><br />
<br />
<u><b>Alpinestars</b> B-52 Leather Jacket Deal</u><br />
Normally $399.99, Wicked Weekend Sale Price is $159.99 (save $240). This is the WWS price for Red and Blue (Black is $199.99, save $200) - no further discounting applies.<br />
Red and Blue: <a href="http://www.cyclegear.com/spgm.cfm?L1=10000&L2=10100&L3=10111&L4=10112&item=PAR_2810-1033_G&name=ALPINESTARS_B-52_Leather_Motorcycle_Jacket" target="_blank">http://www.cyclegear.com/spgm.cfm?L1...orcycle_Jacket</a><br />
<br />
<u><b>Shoei</b> X-Eleven Helmet Deal</u><br />
Normally $607.99, Wicked Weekend Sale Price is $299.99 (save $308). This is the WWS price - no further discounting applies.<br />
<a href="http://www.cyclegear.com/productlist.cfm?kw=shoei%20x-eleven%20full-face&L1=5000&L2=1" target="_blank">http://www.cyclegear.com/productlist...e&L1=5000&L2=1</a><br />
<br />
<br />
With our <a href="http://www.cyclegear.com/satisfaction.cfm" target="_blank">100% Satisfaction Guarantee</a>, our <a href="http://www.cyclegear.com/bestprice.cfm" target="_blank">Best Price Guarantee</a>, and our <a href="http://www.cyclegear.com/returns.cfm" target="_blank">No Hassle Returns</a> you can't go wrong with us. Please call us at <a href="http://www.cyclegear.com" target="_blank">1-800-CYCLEGEAR</a> for anything.<br />
<br />
<br />
<br />
*Offer limited to stock on hand. Prices shown are the Wicked Weekend prices. Prices may vary between <a href="http://www.cyclegear.com" target="_blank">www.cyclegear.com</a> and Cycle Gear <a href="http://www.cyclegear.com/store.cfm" target="_blank">retail locations</a>. Blanket discounts do not apply to Gift Cards or to full-priced items from Alpinestars, Answer, Arctiva, Bell, Dainese, Drag Specialties, Dragon, Firstgear, Fox, GoPro, Icon, Leatt, Moose, MSR, Oakley, Ogio, One Industries, Parts Unlimited, Pro Taper, River Road, Scorpion, Speed & Strength, Thor, Trukke and/or Z1R. Discounts valid only during the Wicked Weekend Sale time-line. Cannot be combined with any other discounts, special offers or coupons - discounts don't "stack" and there's no double-dipping.<br />
**Includes Special Orders
|
|
|
|
| Drifting is CRACK COCAINE (Tips&Tricks?) |
|
Posted by: NickLAudio - 10-20-2011, 03:33 PM - Forum: Help and How To
- Replies (19)
|
 |
OK so I just started to get the hang of drifting after trying and trying for about 2 months straight. Not the rolling burnout into drift crap the actual coming in with some speed and locking rear tire to slide then drift. I can get them somewhat consistent with the occasional lowsidage. It seems like I can get a good full U-turn drift and a couple 3/4 circle drifts but can't seem to keep it going. I either come out of it real smooth or keep it going and almost highside.<br />
<br />
For you guys who have drifting down...are there any tips or tricks you guys incorporated while learning how to drift?<br />
<br />
I know the whole "pin it to win it" thing which has probably been the reason i've never highsided yet (have come close though). And slowly figuring out steering straight makes you slide and counter steering makes you go straight while fiddling in between there keeps your drift going.<br />
<br />
Tips or tricks or any input for that matter is greatly appreciated.<br />
<br />
<br />
<br />
(will try to get video up soon)<br />
<br />
EDIT: I've raised my rear tire psi since my avi pic so don't worry
|
|
|
|
| R6 Cracked Head!!! Frame Flexing? Motor Swap Questions |
|
Posted by: CT Mike - 10-19-2011, 10:39 PM - Forum: Help and How To
- Replies (19)
|
 |
Just doing some routine cleaning/bolt checking and i came across this.<br />
<img src="https://lh4.googleusercontent.com/-aIgmvzCiA5c/Tp95ZOg4MNI/AAAAAAAAFZA/MZTs4SW1feo/s640/photo.JPG" border="0" alt="" /><br />
ANyone ever seen this happen before?<br />
<br />
Trying to figure out my options, I have an other motor from a 04 r6, will it work with all the 08 stuff on it(injectors/wiring/ect). These are both R6S models. <br />
Or <br />
do i just take the motor out, push the crack back and weld and plate the side of the head on the motor?<br />
<br />
Motor still runs good with no issues and lots of power, just trying to figure out how this happened and the way to go. I also run a A-town cage and allways replace the sliders with new ones once there beat down. <br />
Ive been riding for sometime now and im not too bad on my stuff, i rode an f4i for 3 years before switching to the r6, just looking for some input
|
|
|
|
| Stand up help? |
|
Posted by: Deshi Kicks - 10-19-2011, 04:47 PM - Forum: Help and How To
- Replies (19)
|
 |
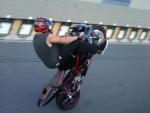
Ok so about 5-6 years ago I used to clutch up in second-third and ride it out, and do circles at red lights etc (with one foot on the ground). I never got much further than that, and I haven't done anything since. I was a lot smaller back then. Now I'm a pretty big dude so that's somewhat of an issue but it can be worked with.<br />
<br />
I can clutch it up and ride it out in first, but I wanna learn how to stand. Like right foot on front footrest/brake, left foot on passenger footrest. I'm worried about either looping or going off to the left. Should I push down with my left foot, or pull up, or just let the clutch do all the work? What do you guys suggest?
|
|
|
|
| Video: 2011 Dirty George killz |
|
Posted by: StrictlyStunt - 10-19-2011, 09:02 AM - Forum: Videos and Reviews
- Replies (19)
|
|
The northeast is home to so many amazing riders. One of my favorite's is Dirty George. While editing the northeast mega session footage from last week, I decided to throw together a quick mix of one of his sets. <br />
<br />
Strictlystunt mixtapes will be dropping more and more as we go through over 500 hours of footage we have stowed away at strictlystunt HQ. As well as lots of new stuff we have planned including rider profiles Stay tuned for more and enjoy this one! Short but very very sweet riding. George kills it!!! Please share and help promote his riding!<br />
<br />
<div style="display: none;" id="ame_noshow_post_1349758390_1">
<a href="http://vimeo.com/30788277" title="strictlystunt mixtape trailer - dirty george killz on Vimeo" target="_blank">strictlystunt mixtape trailer - dirty george killz on Vimeo</a>
</div>
<div style="display: inline;" id="ame_doshow_post_1349758390_1">
<div align="center">
<table class="tborder" cellpadding="6" cellspacing="1" width="425" style="margin:10px 0">
<thead>
<tr>
<td class="tcat" colspan="2" style="text-align:center">
<a href="http://vimeo.com/30788277" title="strictlystunt mixtape trailer - dirty george killz on Vimeo" target="_blank">strictlystunt mixtape trailer - dirty george killz on Vimeo</a>
</td>
</tr>
</thead>
<tbody>
<tr>
<td class="panelsurround" align="center">
<object type="application/x-shockwave-flash" width="425" height="350" data="http://vimeo.com/moogaloop.swf?clip_id=30788277&server=vimeo.com&fullscreen=1&video_info=1"> <param name="quality" value="best"><param name="allowfullscreen" value="true"><param name="scale" value="showAll"><param name="movie" value="http://vimeo.com/moogaloop.swf?clip_id=30788277&server=vimeo.com&fullscreen=1&video_info=1"></object>
</td>
</tr>
</tbody>
</table></div>
</div>
|
|
|
|
|